And that’s about as exciting as a knitting post is going to get.
I thought about this sweater all of last winter. It was my carrot, my reward, for de-stashing. I didn’t want to buy more yarn for it without using some up because of the yarn horde in the garage. (I meant, hoard- but see my garage and you may think horde is more appropriate.)
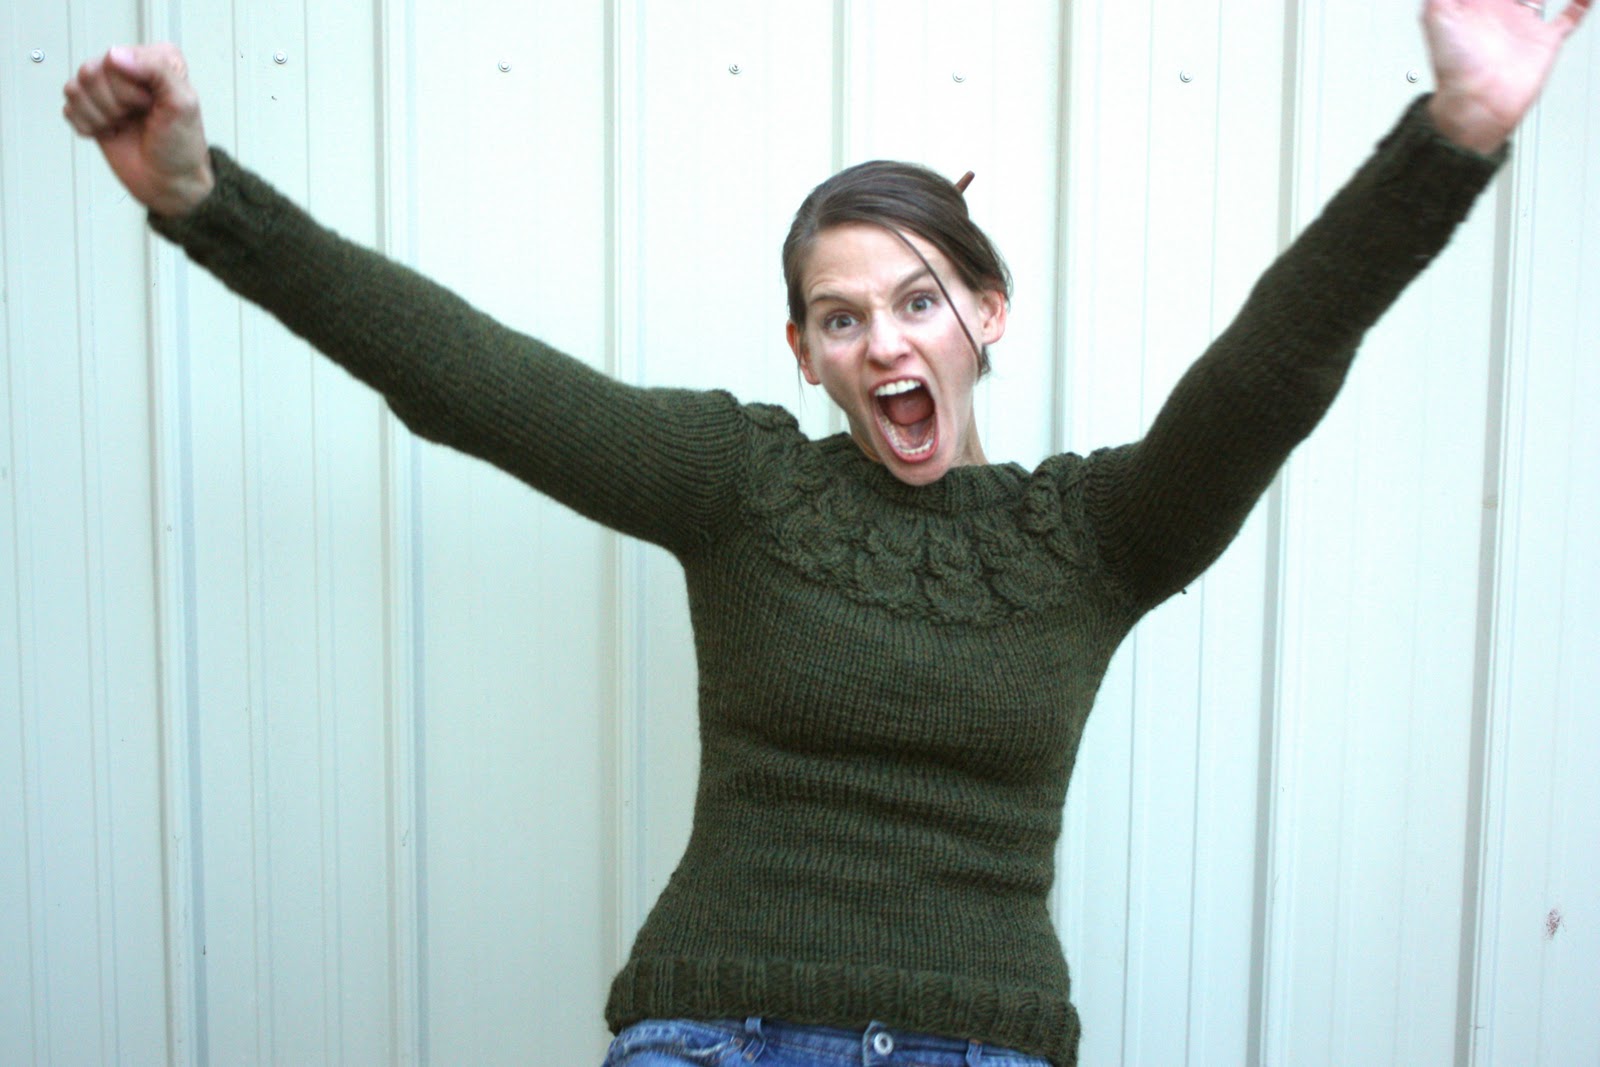
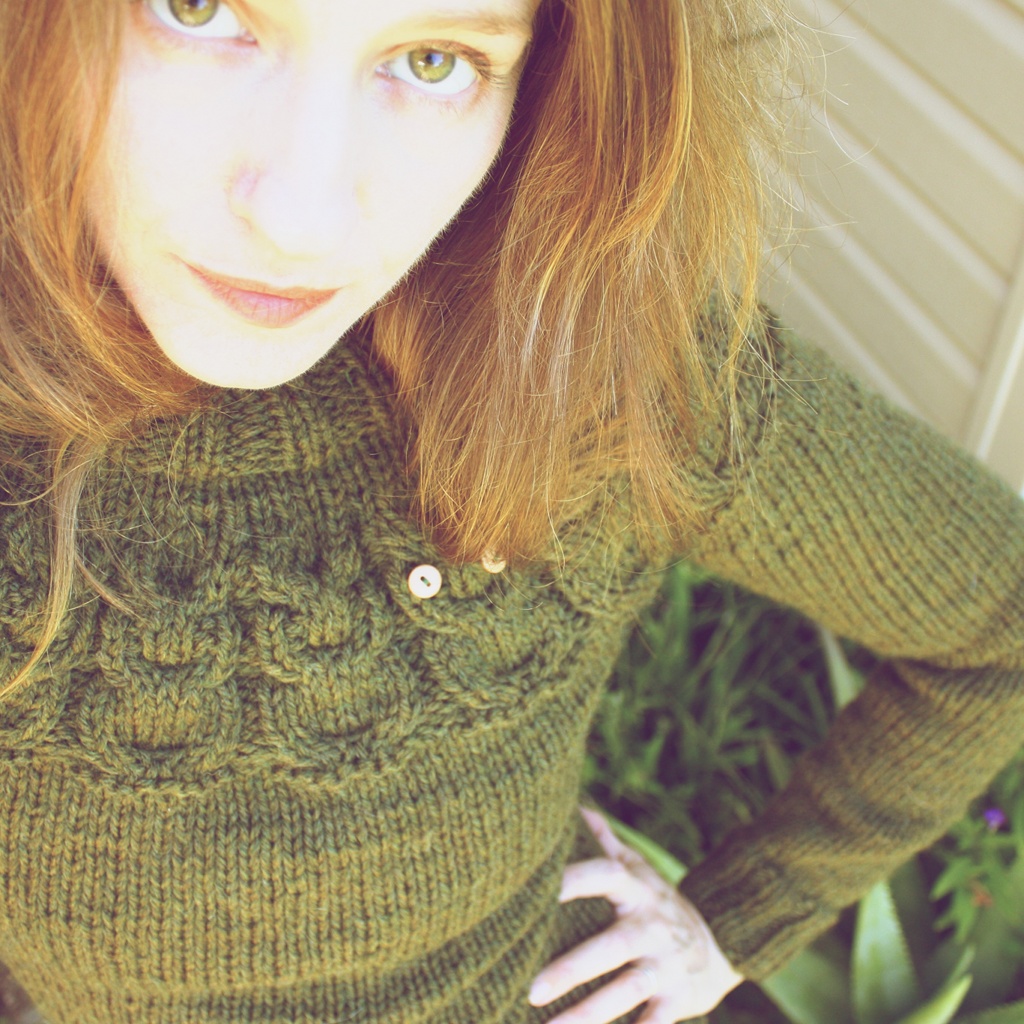
Now, Fall is here and I just couldn’t wait anymore, so I used the wool I had on hand, made the most of being awake at night with sinus headaches, and got me some Owls.
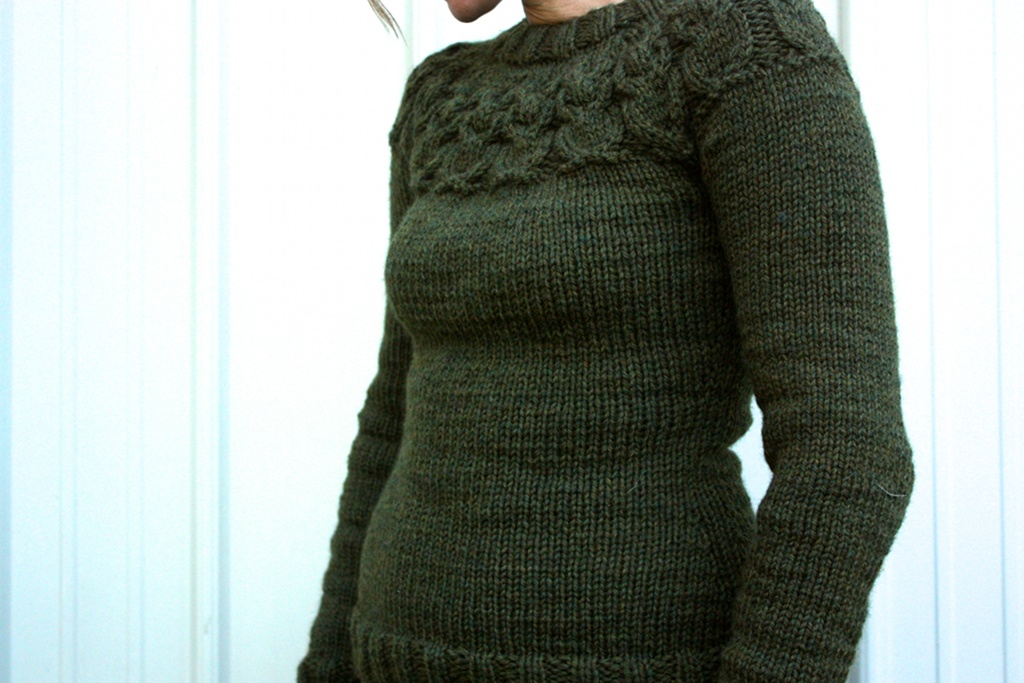
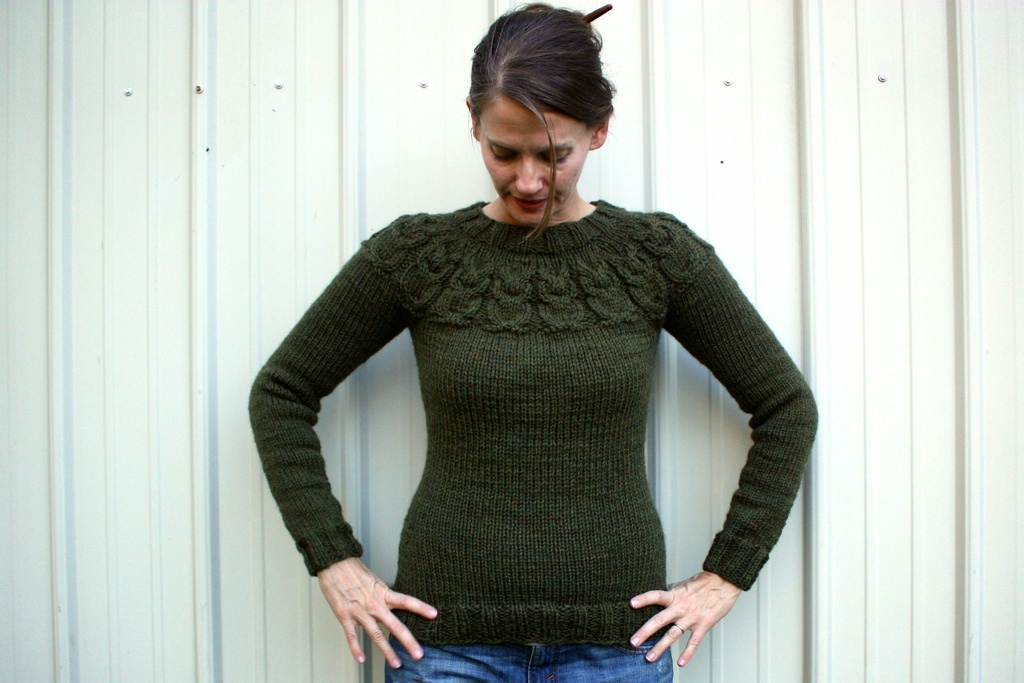
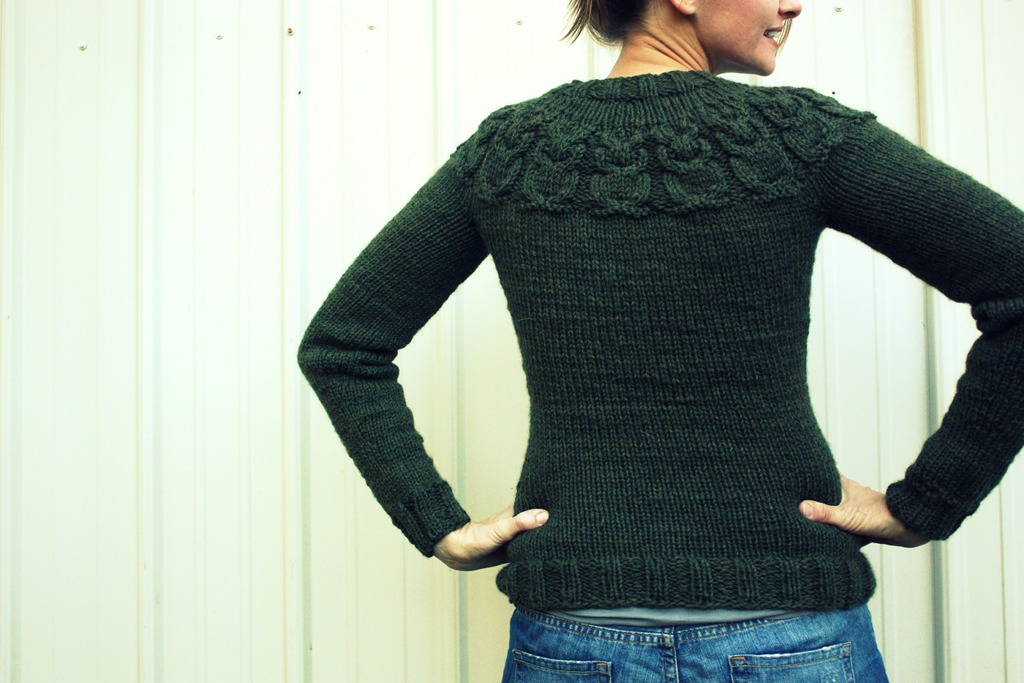
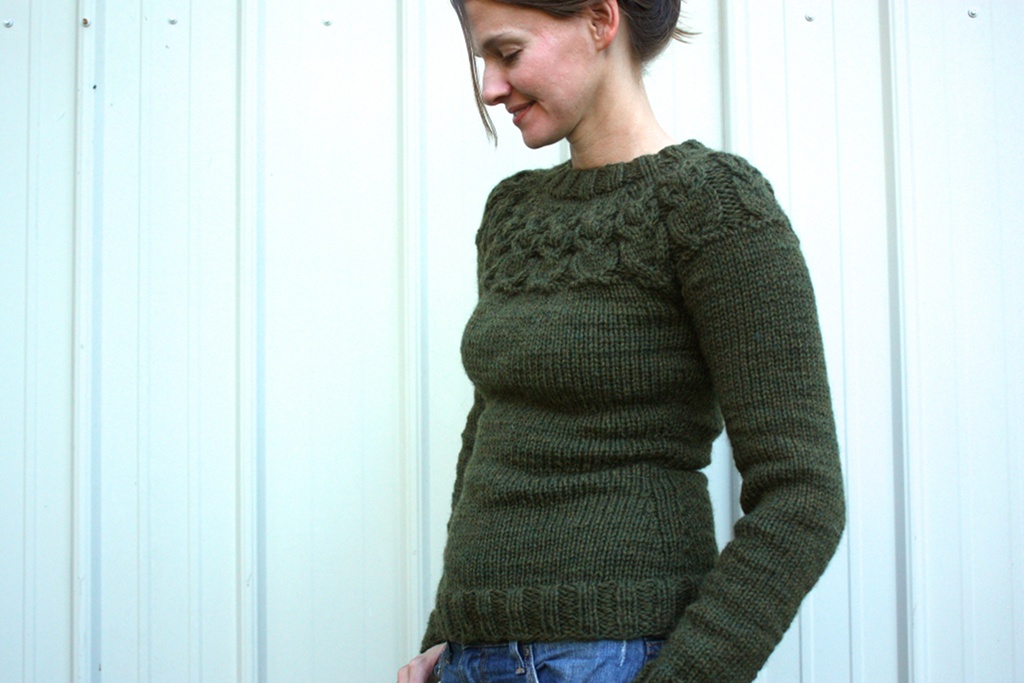
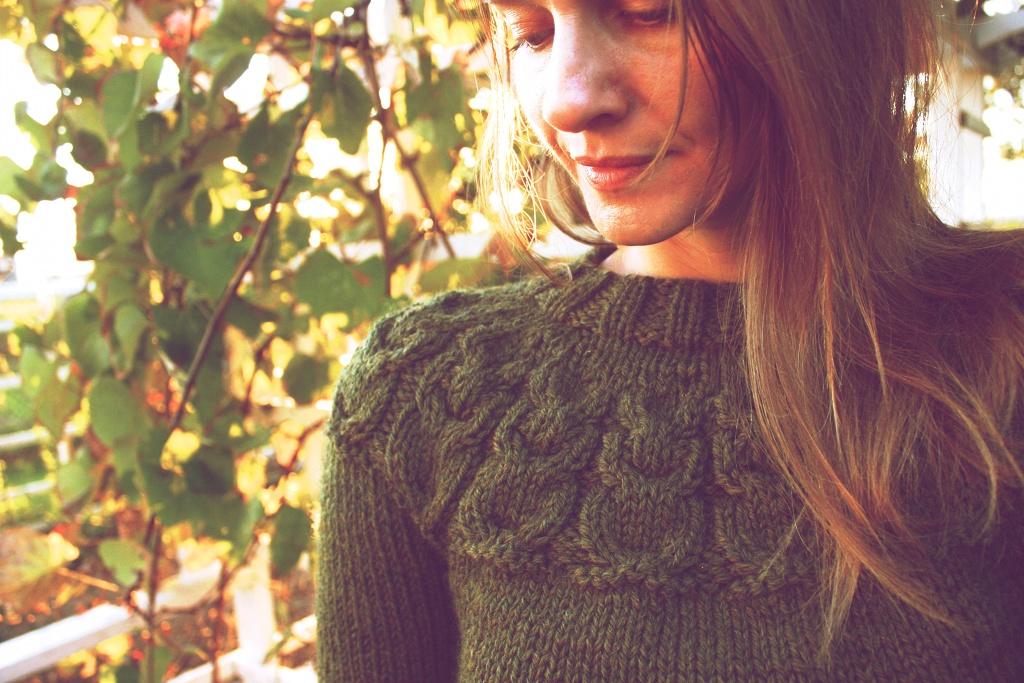
What an ingenious idea, Kate Davies! Using cables to form owls with button eyes around the yoke, who would think of that? It calls for a chunky yarn (I held two strands of Patons Classic Wool together) and is seamless so it really can be finished in a couple of days, or, as is often the case, a couple of late nights.
The other knitters on Ravelry were right, it is a three day project… but not for me. I started over twice on the body. Once, to make a modification and the second time because I watch too much tv while knitting and absentmindedly cast on too few stitches. So, when I added my sleeves to the body, I was 4 stitches short and couldn’t do the owl pattern. I considered just making one owl smaller… and a cyclops, but decided against it.
I don’t know why I do these things to myself. This wasn’t a difficult pattern, but I guess I have a subconscious need for drama, so I started the body again.
Aside from my own inherent need to complicate things, this pattern was a breeze. I had my pattern marked with the correct mods for this final attempt and watched something stupid on Netflix while knitting, like Felicity, (talk about drama) that didn’t require mental energy. Any show where great portions of each episode are spent lingering on college kids shyly saying, “um, Hey” “Um, yeah, hey” to one another shouldn’t befuddle my knitting math.
How I modified
based on lots of other knitters’ notes:
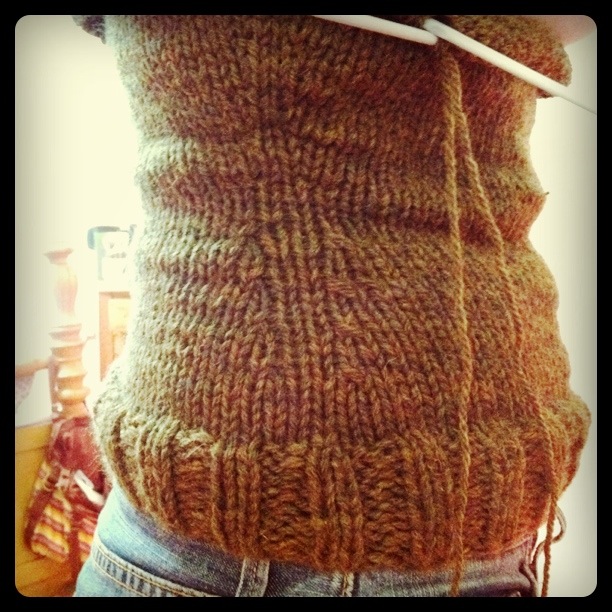
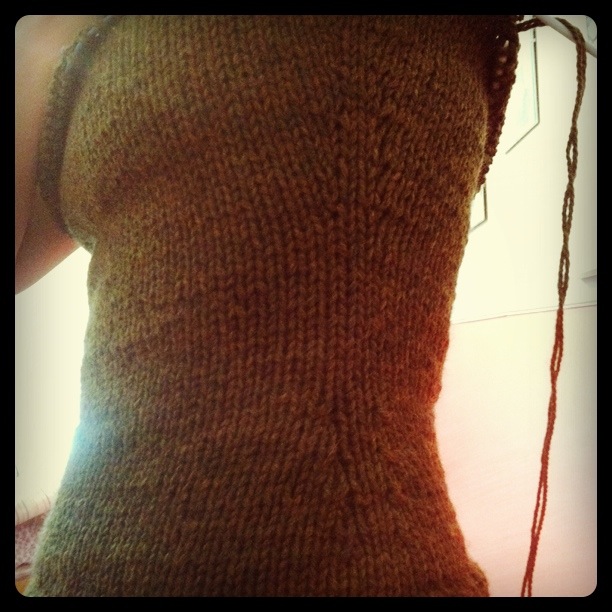
1) The first change was to work 3 inches of stockinette between the decrease and increase rounds for a better fit. You can see before and afters, below:
(before spacing out decreases and increases)
(after adding 3″ of stockinette between decreases and increases)
2) I also moved all shaping to the sides so the back wouldn’t poof out (I slump enough at it is)
3) and left off the last increase on the body (That’s 4 decreases and 5 increases total for a size 2, all on the sides.) Though it reduced the stitch count by 4 stitches on the body, it allowed me to add 2 stitches to each sleeve.
This way, when I joined all of the pieces, I still had the correct stitch count for the owls portion, but with a little extra room in the arms, which many knitters found tight. My biceps aren’t exactly buff, but I do start to feel panicky when constricted in tight clothes. There’s nothing worse than spending weeks on a project just to feel like Bruce Banner about to blow. I need full range of motion. That’s why I test these things when shopping: swinging my arms to the sides, crossing them, deep knee bending, ninja crawling in the Target fitting room… you know basic, everyday movements.
4) For the sleeve increases I increased two stitches immediately after the ribbing on each sleeve to get back to the correct stitch count (as I explained above.)
5) I then knit for 3 1/2 inches before starting the regular sleeve increases.
6) When I joined the body and sleeves, I knit two more rows of stockinette than the pattern called for to get more ease in the armpit area.
7) I followed the pattern for the rest of the project, except I went down two sizes on the needle I used for the neckline ribbing and only sewed two buttons on for eyes.
Besides learning a few techniques for getting more ease in the under arms, I also learned to work a stretchy bind off for ribbing. It did work better and have a cleaner edge than the usual bind off I use.
Okay, I don’t know about you, but that’s about all of my frizzy hair and shiny face I can take for one post. Tomorrow, it’s back to still life photos. But right now, I’m going to read this post to my husband and see how far I get before he zones out.
I miss photo albums.I was just looking at this first batch of polaroids I made and thinking how I need an album. (365 Day 120 Photo) Not the computer kind….
(Old Friends, 365 Day 135 Photo) Here’s some old friends. They’re the kind of friends you know well and can stare you down and hold you accountable. I keep saying…
Take a look at my completed hand knit Guilloche Pullover by Aílbíona Mchlochlainn and immerse yourself in the same nostalgia for the 90’s (or rather, my 90s) that led me to knit this.
Episode 43 we discuss purging stuff and I share my Holly Jolly socks and other sock designs and the beginning of a granny stripe knit just for me in the scrappy blanket make-along!
I loved the bright color of my first Beatnik, but this one is a more familiar color. Like a sweater my husband used to have, the color of Fall leaves,…
(365 day 3 photo) I’m not a total bum- I did my daily photo.
3 Comments
I didn't understand half of what I read, but that is one beautiful piece of work, Michelle! Kudos to you on a job well done. I love the color of the yarn, too.


I didn't understand half of what I read, but that is one beautiful piece of work, Michelle! Kudos to you on a job well done. I love the color of the yarn, too.
That's funny. Gail. I almost put myself to sleep writing this. And thanks!
I was totally into the technical details. I'm gonna knit this myself soon, so I loved the detailed notes!