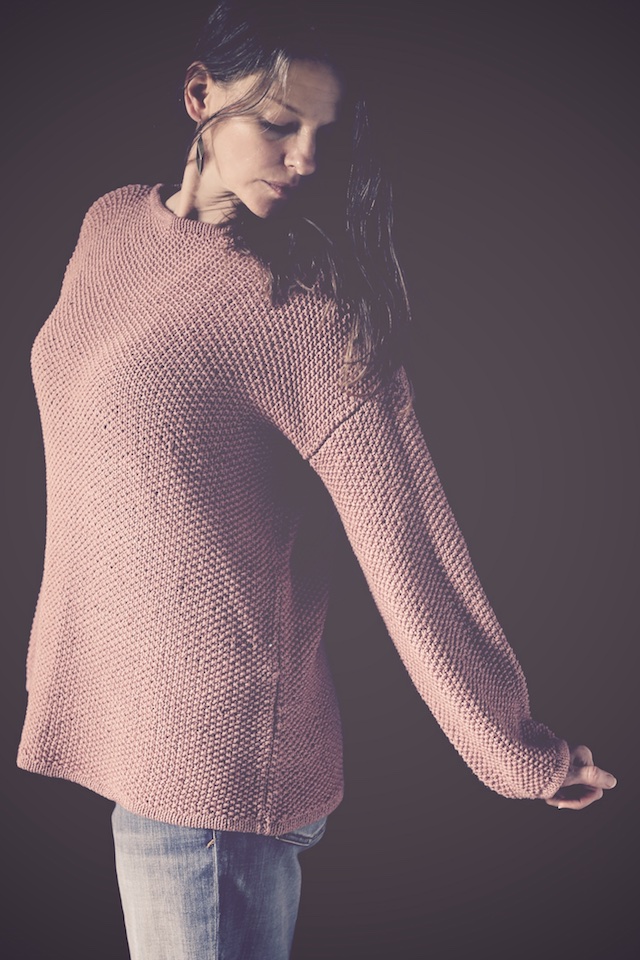
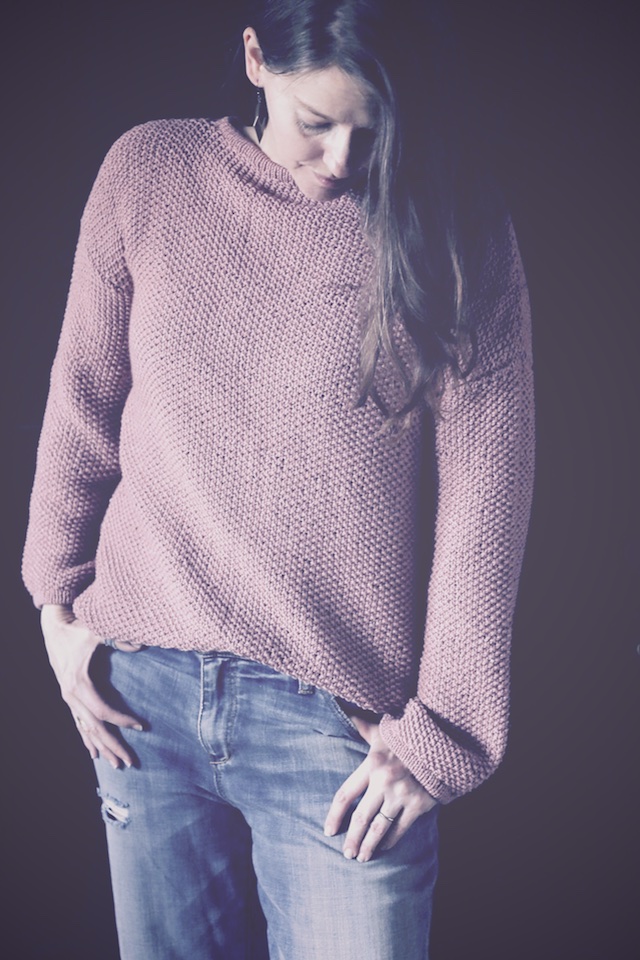
Julia Sweater
I don’t know what happened. I slipped this big sweater over my head and next thing I knew it was like the last 26 years were a dream. What? I’m 17 again, wearing guys’ sweaters with baggy… everything?
Friends, I knit the biggest, simplest, most monotonous seed stitch sweater ever and it is perfect! I once thought I’d never knit oversized, drop shoulder sweaters. Never say never. At my heart, I am a product knitter. And a tomboy. Now I won’t have to borrow any of my husband’s sweaters if I want to wear something big and cozy. I can just pull on my sweater-as-fountain of youth and feel like a girl again. Minus the angst and melancholy about growing up.
My son asked if I meant to wear dad jeans for these photos. Are dad jeans a thing?
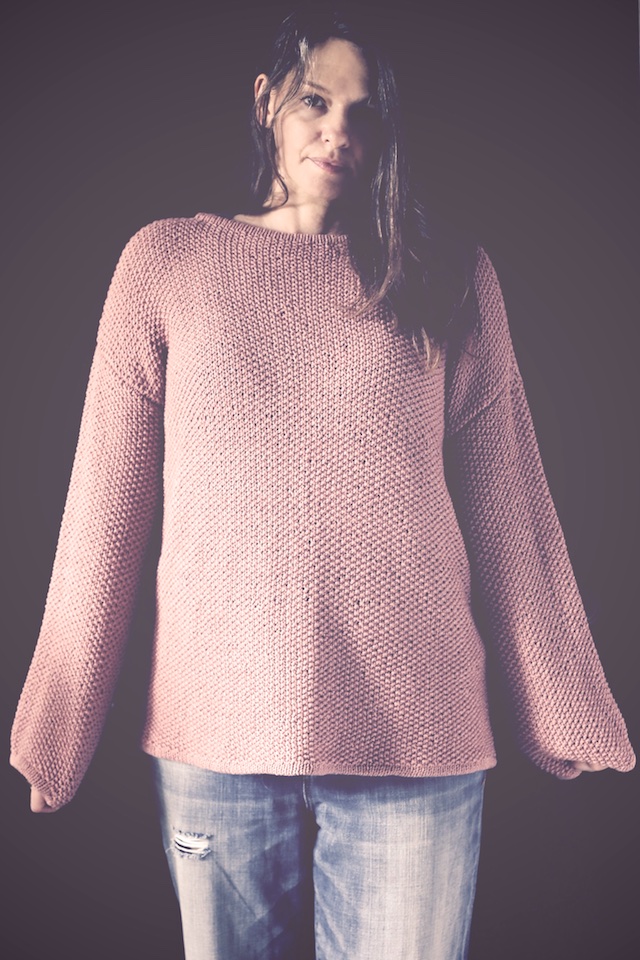

This is the Julia Sweater from Wool and the Gang. Remember how I was finally getting around to knitting one of their patterns? Well, I did and I’m so pleased with it.
Don’t let my declaration that the stitch pattern was monotonous come across as a put down. It’s not. I mean, to a new knitter this would be fantastically interesting. To me, it was a slog. But a slog that took me through a season of Crazy Ex-Girlfriend, and the first season of Major Crimes (because I missed my Closer friends, even though it’s not as good as The Closer.)
Sometimes you want a tv knit. In my case, I wanted a lot of it. After a while, I found a rhythm and the purling, every other stitch, wasn’t so maddening. And, boring as seed stitch is to an advanced knitter, it makes the best finished sweater!
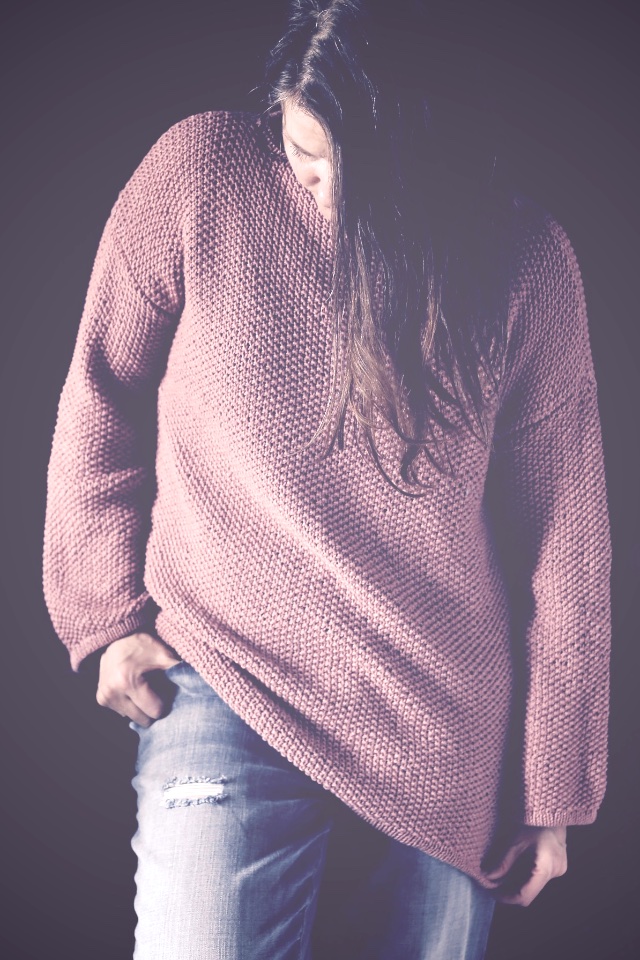
There is a lot of seaming, but what else can you do when you knit a four piece sweater this big. If I’d knit it in the recommended 100% cotton, think how heavy and twistable it would be. Nah, this needed nice, sturdy seams. That process was actually pretty easy. I don’t think I had to rip it back and start over once. With no shaping, the pieces fit together really well.
Details: I used size US 5 needles and Classic Elite Chesapeake yarn in the Faded Rose colorway. That sounds like a country singer’s stage name. It is 50% wool, 50% organic cotton. This made all of those little stitches more bearable to my hands than pure cotton would have. It will also be more wearable, for me, without as much wool content as usual. The yarn is discontinued, hence the super cheap price tag, but I really, really, enjoyed working with it.
So with all of this straightforward design, the only challenge for this knit was planning for after-wash growth. I wanted just the right amount of “oversize,” you know. My gauge was off, but I can’t remember by how much, and I’ve misplaced my printed pattern at the moment. I think the pattern gauge was 14 sts/22 rows and mine, before blocking, was 16 sts/ 28 rows per 4 inches sq. After blocking, it was 16 sts/ 24 rows. I did stretch it for length when blocking, but I think I could have easily blocked it for more width, if I’d wanted to. That’s what I did with the sleeves, in fact.

I followed directions for a medium but my finished chest circumference was 42 inches, that of a size large, giving me about 7 or 8 inches of positive ease. That’s about the amount of ease the sample seems to have on the model.
I noticed lots of finished Julias on Ravelry were more fitted than the sample on WatG’s site. So I made a last minute decision to make mine larger than I’d originally planned, which led to a rousing game of Yarn Chicken. I ended up finishing the front and not being happy with the length. I blocked that piece and got 2 more inches out of it, but would have preferred more.

So I decided to knit an extra couple of inches on the back, see how much yarn I had left, then come back to the front to add length if my yardage allowed. I counted my additional rows so that after I ripped out the front neckline, I would be able to add exactly the same amount of length as I had on the back.
I then moved on to the sleeves. I wanted a bit of “overhang” with those, too. So after knitting them extra long, two-at-a-time, I blocked them for width and held them up to the sweater, to see if I had the length right.

This is when I placed markers on the sides of the body where each armhole should begin, so that I’d have plenty of room where sleeve and body joined. Several knitters mentioned having trouble with tight armholes. I was hoping that by blocking the sleeves for width and the body for length I would have plenty of room for a nice sized armhole.
I usually have to remind myself to not seam pieces too tightly, but when the pieces are pre-blocked I feel I have to be careful to not be too loose. I don’t know if the seaming yarn will grow a bit after washing and with the added weight of the pieces. It probably wasn’t necessary, but I was mindful to keep my stitches from being slack.
My finished measurements were 26″ in length, 42″ bust, and 14.5″ around the arm at the sleeve/body seam. That means I got 3″ extra, in length, from blocking. I’m wearing it with about 7″ of ease.
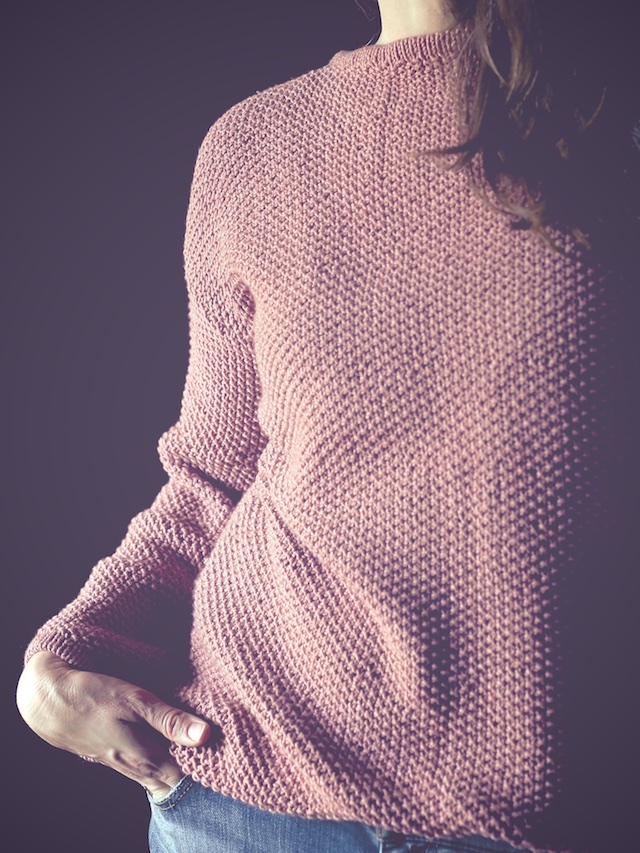
Here’s what I love about this sweater: Seed stitch (once it’s knitted)-duh,
The turned under edges of neck, cuffs, and bottom. All of that turning and stitching was super tedious, but it gives this a professional look. By professional, I mean better than the oversized crap they sell at PacSun, etc.

The way the neckline widens, when seamed under.

Seed stitch with jeans.
(more on Ravelry, Kollabora, Instagram, and Flickr)
My next knit from Wool and the Gang will probably be the Tommy Top or a beach bag- can’t decide. There’s also that Christmas gift I need to finish…
Other posts on this sweater: planning and trucking along